Reinstalling Windows without a USB/external drive
Disclaimer: Although I'm a Microsoft employee as of writing, the information presented here is my opinion only and does not reflect the views or opinions of Microsoft, does not represent any official instructions from Microsoft, and is not endorsed nor sponsored by Microsoft. My work at Microsoft is entirely unrelated to Windows and this guide. If you decide to follow these steps, you are doing so entirely at your own risk.
This page is also accessible from the short link 1l.hn/rewin.
Introduction
I've been hanging around in the Microsoft Community Discord for a while now and have been helping people out randomly when I'm bored. One common issue that comes up is someone has an installation of Windows that isn't quite working properly, but they can still do basic operations in Windows such as downloading files, accessing explorer, or booting into Safe Mode with Networking. They want to reinstall Windows, but lack an external USB or hard drive and so are unable to follow the typical Windows reinstallation from external disk steps.
There is the "Reset this PC" option in Windows, but in my experience it literally never works properly for anyone. So here are some alternative steps you can use instead to enter Windows setup without an external disk.
Overview
The main overview of the installation process is:
- Acquire the Windows installer ISO.
- Copy all the files of the installer out into an accessible folder, on an ideally unencrypted disk.
- Boot into WinPE via System Recovery Options.
- Run setup.exe of the Windows installer in WinPE.
Step 0: Get to a working Windows environment
If your Windows environment isn't working properly but is partially working, you may have better success performing these steps in Safe Mode with Networking.
Step 1: Acquiring the Windows installer ISO
The easiest way to acquire the Windows installer ISO is from Microsoft's website.
If you're on Windows, you can either spoof your user agent as a Linux device (I find the most success spoofing in Firefox) to directly download the ISO from the link above, or you can download the Windows 10 Media Creation Tool (which is the default when the page detects you're on Windows), and opt to save the ISO somewhere when you run the tool.
If you're not on Windows, you will get a direct download for the ISO file.
Step 2: Copy the ISO files out
Mount the ISO by double clicking on it, and copy all the files inside the ISO out to somewhere easily accessible and ideally unencrypted, ideally close to
the root of your disk. Like C:\winiso for example. If your disk is encrypted with BitLocker, you need to acquire the recovery key in order to access the drive in WinPE.
Step 2.1 Preparing for the reinstall
If you have any files you would like to keep from your C: drive, now is the time to copy/back them up. Reinstalling Windows will result in irrecoverable loss of all your data and files in your C: drive (and only your C: drive). You have been warned.
Now we need to note your letter to disk mapping. Most importantly, the disk you copied the ISO files to and your C: drive. To do this, open Command Prompt, type diskpart, hit enter, in the DISKPART> prompt, type list volume, hit enter. You should see something like this:
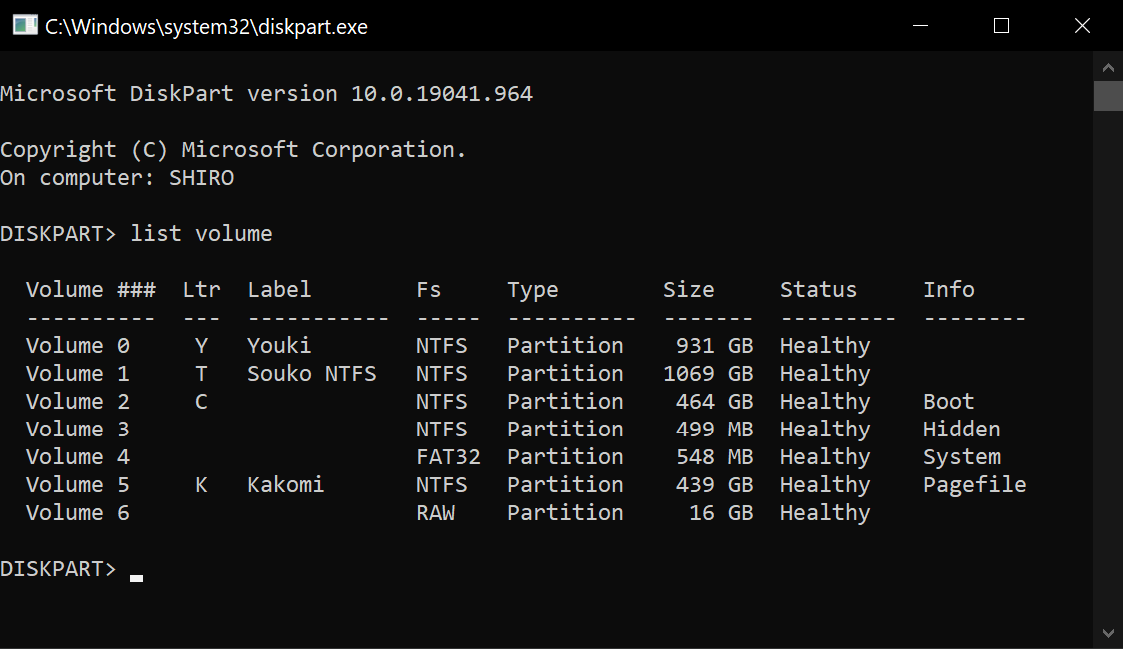
Note down the Label, Size and Info of the Volume which has C in the Ltr column, and also the Volume that you copied the files inside the ISO to.
It's also a good idea to note down the edition of Windows you have installed as you will be prompted for it on reinstallation. Search for "About your PC" in the start menu, or click on this link if you're reading this on the PC you're performing these steps on. Note down the Edition under "Windows specifications". It should be something like Windows 10 Pro or Windows 10 Home.
Step 3: Booting into WinPE
Get to the Windows Advanced Startup screen by following these steps. Stop once you've reached the Advanced Startup screen, shown below.
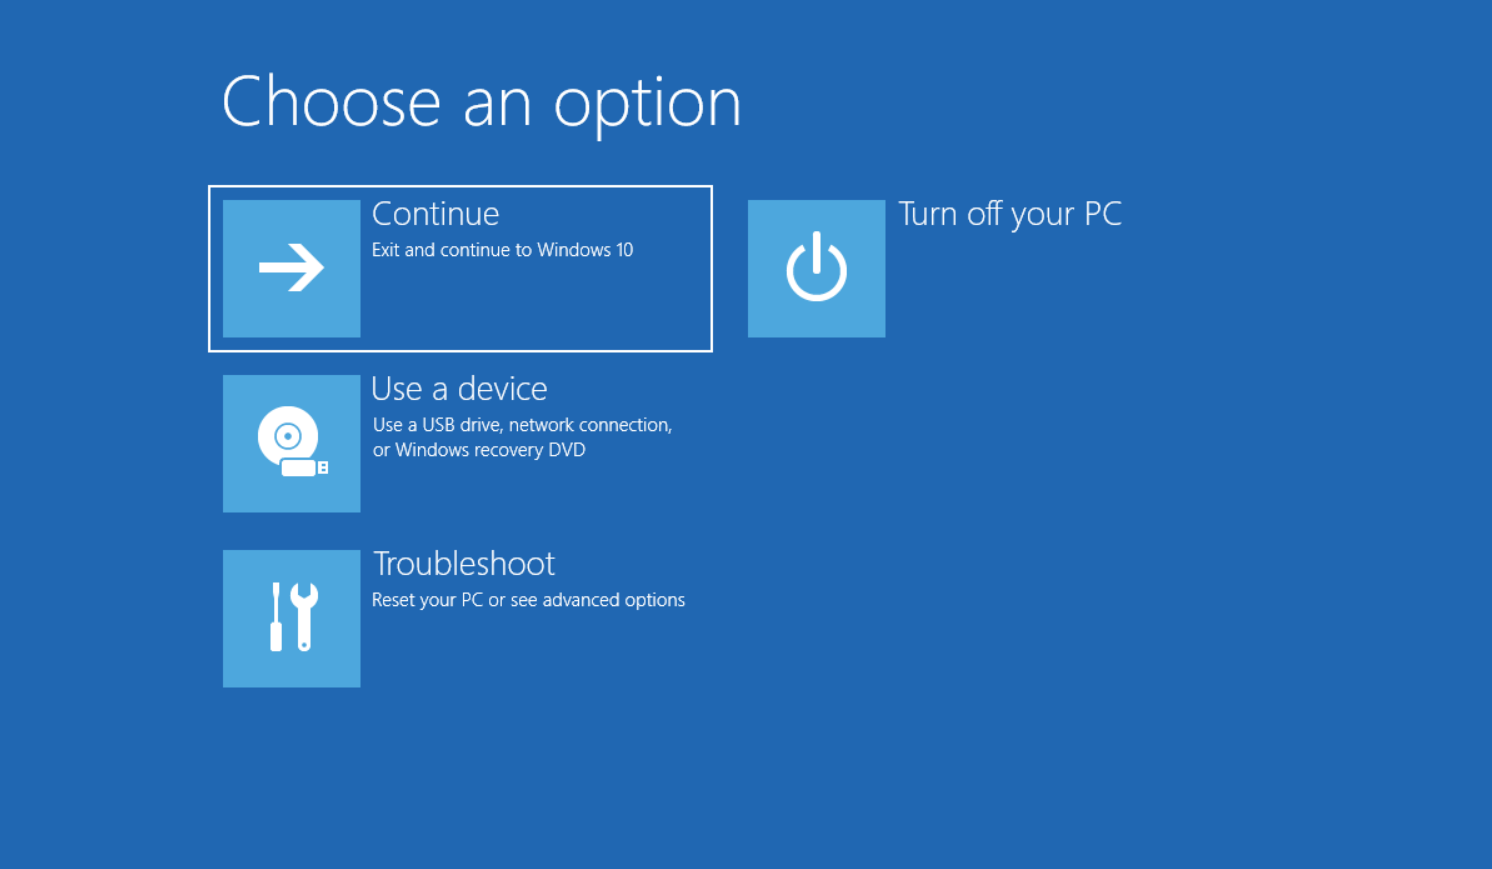
Navigate down to Troubleshoot, then Advanced Options, and then Command Prompt. You may be prompted for a BitLocker recovery key if your drive is encrypted, enter it if so.
Congratulations, you're now in WinPE, which is a small Windows environment that runs entirely in-memory.
Step 3.1: Finding setup.exe
Drive letter mappings in WinPE may not be the same as your usual Windows environment, so it's important to identify the new drive letters.
Using the information you collected in step 2.1 from diskpart, compare it against information in WinPE by running diskpart in the command prompt, and then once you see the DISKPART> prompt, run list volume. Identify the new disk letter for where you copied the ISO files to based on the Label, Size and Info (typically comparing Size is good enough). Once you've identified the new drive letter, hit ctrl + c at the same time (as if you were copying something) to quit diskpart, and it should kick you back to command prompt (it should say X:\windows\system32>).
Now type the disk letter, followed by colon, for where your ISO files are (using the newly found mapping). For example: C:, and hit enter.
Now use the cd command to navigate to where the files from the ISO are. For example you could type cd C:\winsio. If you want to see the files in the current directory, type dir. You can also navigate relative to the current directory, for example if I'm already in C:\ as indicated by the path in the command prompt, I could also type cd winiso.
Step 4: Run setup.exe
Run setup.exe by typing .\setup.exe. Boom, that should be it, you should now see the Windows installation menu!
Follow the prompts to reinstall Windows, using the same Windows edition that you had installed previously. If you are prompted for a product key, you can skip entering it for now by clicking on something along the lines of "I'll enter it later".
If you want to be sure you're reinstalling Windows to the correct drive, click on "Custom: Install Windows only (advanced)" when it prompts you for which type of installation you want.
Be very careful with these next steps, as by selecting the wrong partition you could lose data on other disks that you didn't intend to erase.
Identify your old C: drive based on the diskpart information you collected earlier and the sizes of the partitions shown. Select that partition, click "Format", then ensure it's still selected, and hit Next.
If there is an error with doing that, delete the partition instead, click on the newly created Unallocated Space, and then hit Next.
Conclusion
That should be it. If you need any further help or if you have feedback for this guide, you can contact me via Discord at 1lann#0001 or email me at [email protected]. Thanks for reading!